The kitchen is considered the heart of the home, and it literally is in my house! I love my kitchen and the warmth it brings to my home. But I didn’t love it when I bought my house. As I am sure most of you know the kitchen is one of the most expensive spaces to renovate and like most people I didn’t have tens of thousands of dollars to do a full blown remodel. So I started to research an affordable way to flip my kitchen! The first project I decided to tackle was painting my kitchen cabinets! I had painted my cabinets in my first home and also do so for many clients. After a lot of trial and error over the last few years, I have learned a few things.
So here are the top 5 things to know when painting your kitchen cabinets.
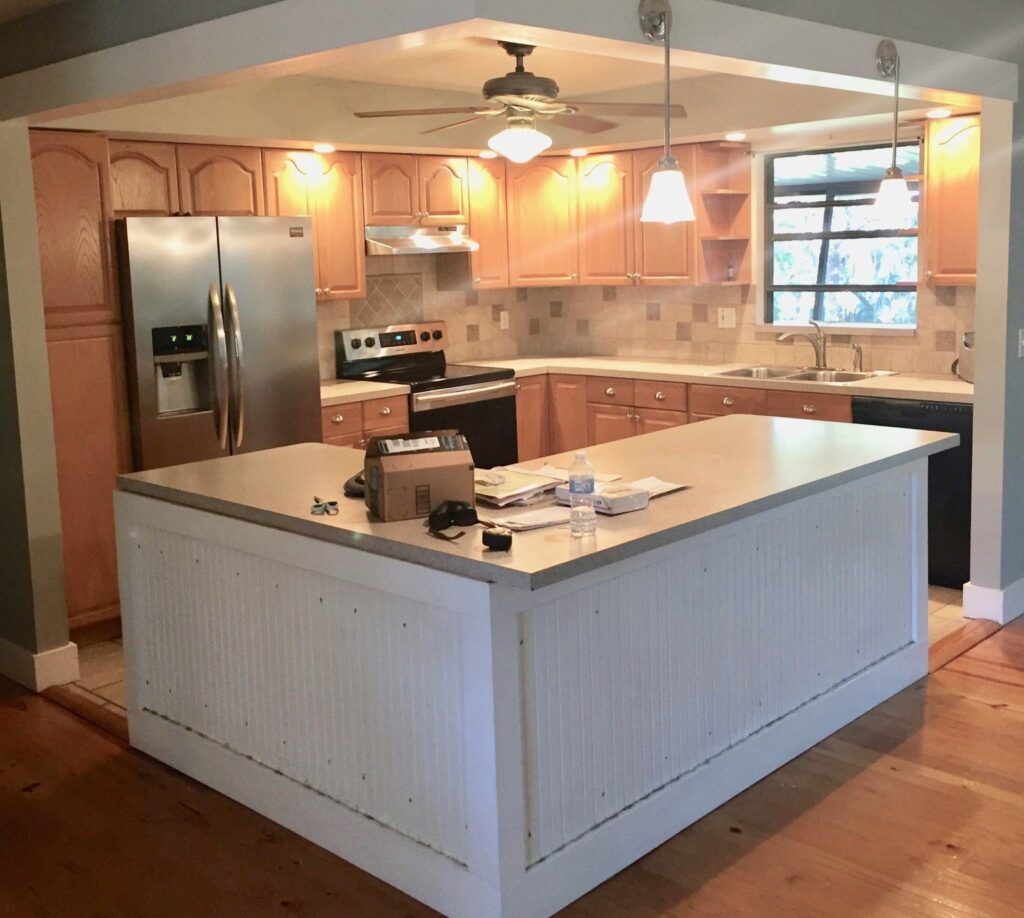
Kitchen Before
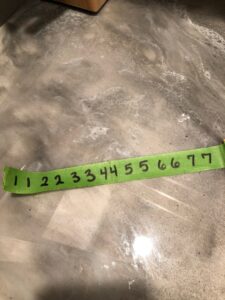
#1 Label Your Cabinets
Before you take off all of your cabinet doors, use blue painters tape and label the cabinet doors and the inside of the cabinet boxes.
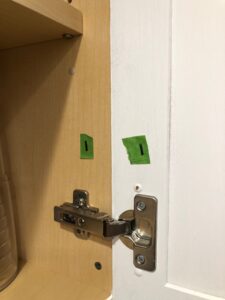
When taking off the cabinet doors you want to leave the hinge attached to the cabinet box. I used my drill to remove the cabinet doors. I love my drill it is so versatile and can be super powerful for building farm tables and drilling into concrete but can also make the small jobs like removing cabinets so fast and easy!
Trust me you do not want to unscrew everything by hand.
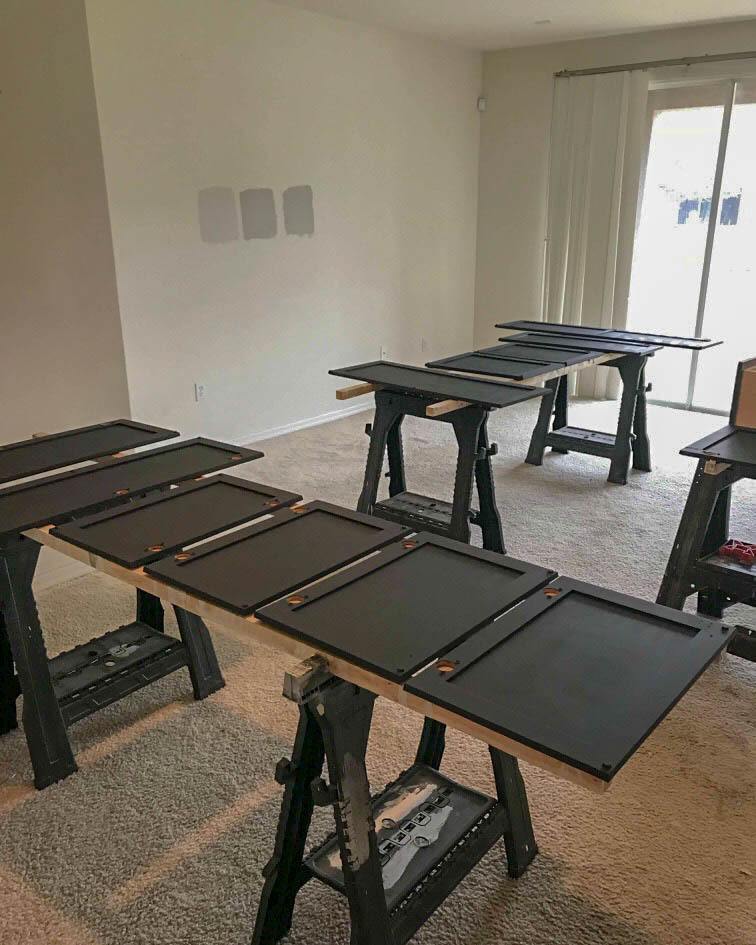
Once the doors are removed I use sawhorses and 2 x 4’s to create a workspace. These sawhorses are so easy to set up and allow me to prep several cabinet doors at once. When I lay out the cabinet doors I try to leave the doors in order to make it easier to put them back up later.
#2 Clean Your Cabinets
I lay the cabinets out and clean them with a shop towel and this pre-paint cleaner. The shop towels are great because you can just throw them out when you are done and you don’t have to worry about washing them when you are done. And I have tried several pre-paint cleaners and this one is by far the best! This process eliminates all of the built-up grease and grime that has accumulated over the years. I also use a deglosser to remove the finish from the cabinets and then hit them with my sander. Prep work is key!
#3 Choose the Right Paint and Applicator
Once the cabinets are clean I use a foam roller and this paintbrush to apply Mudpaint! I love how much quicker the painting process goes using a foam roller and the paintbrush helps you get into those decorative creases that most cabinets have. MudPaint is a high-quality paint that I use for its durability, even coverage, and a smooth matte finish. Kitchens get a lot of use and need to be beautiful and durable. My kitchen took 7 quarts of Mudpaint! (If you need help figuring out how much paint to order feel free to contact me or comment below!) Mudpaint was nice enough to provide a special promo code offering Frickin Fab readers 10% off. So go check out MudPaint and make sure you use our promo code FRICKINFAB10 at checkout!
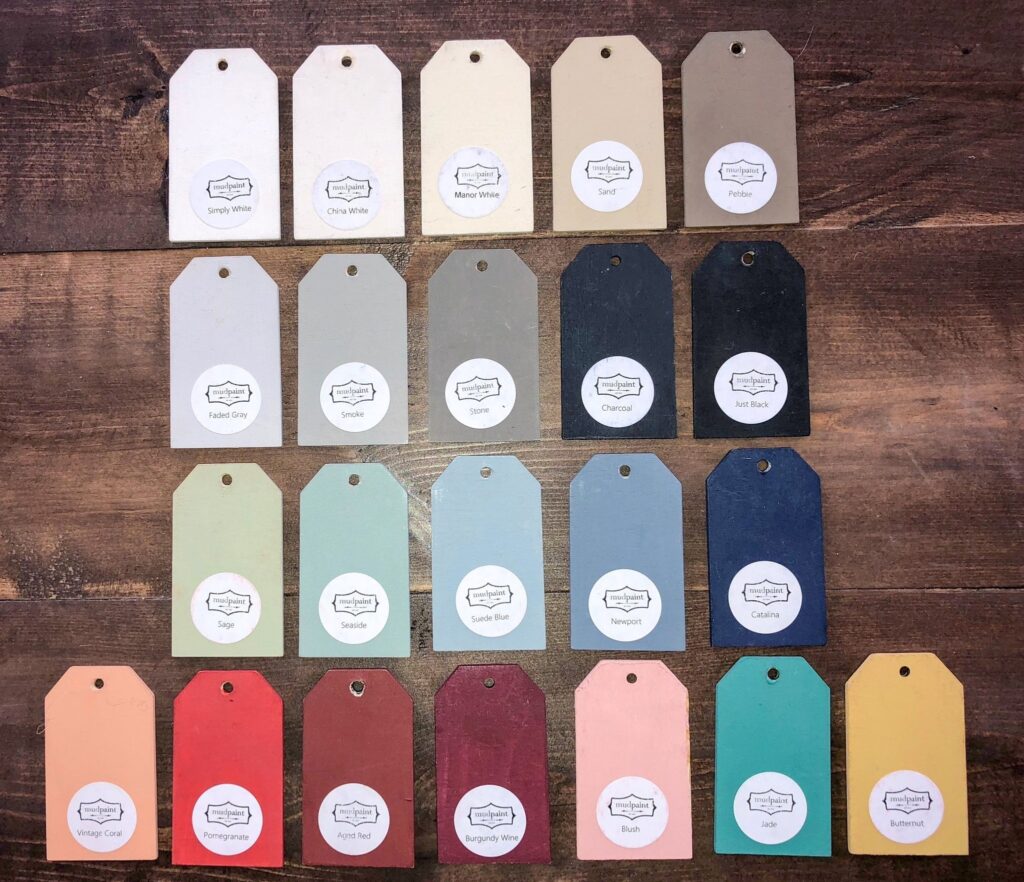
Mudpaint Paint Colors
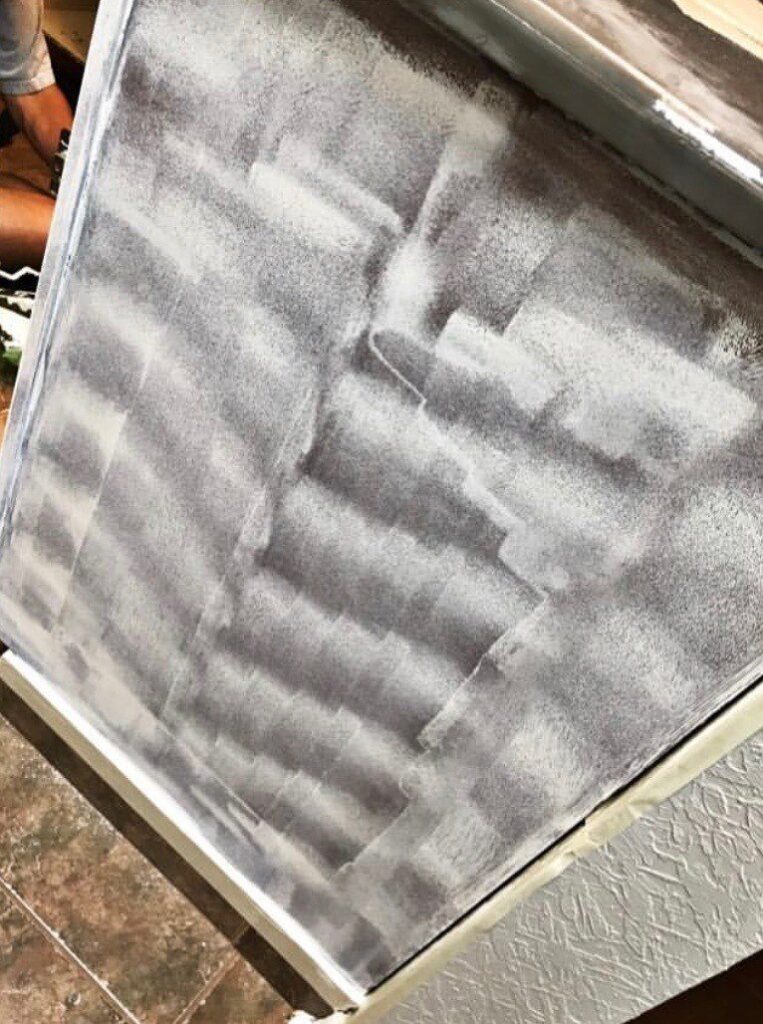
After the first coat of paint on your cabinets you will think to yourself…what have I done? Haha! Don’t worry it gets better. I call the first coat of paint the crumb coat…it is never pretty.
#4 Sand In Between Coats of Paint and Finish
After the paint has dried give it a rub down with a 120 grit sanding sponge. This sanding sponge fits on the palm of your hand and minimizes the dust. It is as easy as wiping a surface down with a sponge. Then apply the second coat of paint…the cabinets will look much better….I promise! You will sometimes need a third coat of paint but not always! I have found that the whites and light colors need more coats than the deeper grays and dark colors. These cabinet doors are from a client’s kitchen and they have two coats of paint and are ready to be flipped over to the next side.
Once the backside of the cabinet door is painted then you can flip them and do the front side. You will use this same process on the cabinet face frames, toe kick and decorative moldings.
Once both sides of the cabinet doors are painted you can choose to leave them and move on to the topcoat or you can give them a slight distress. I love the natural dimension and character of cabinets so I always recommend a slight distress using an 80 grit sanding sponge. Because Mudpaint is so durable you have to use a tougher sanding sponge to get the paint to distress.
I recommend using Mudpaint’s Matte Clear Coat as the top coat for your cabinets because of its durability, low luster, and its true clear color. Several clear coats on the market will yellow over time especially on white paint and Mudpaint’s does not.
Use a brush or sponge to apply the top coat and once it is dry use the 120 grit sanding sponge again to give the cabinet a smooth finish. The brush will apply a thicker coat of the matte clear coat and the sponge applies a smoother top coat. After the matte clear coat has dried, giving the cabinets a quick sanding will eliminate any remaining brush strokes or inconsistencies.
Repeat this process on both sides of the cabinet doors as well as the face frames of the cabinet boxes.
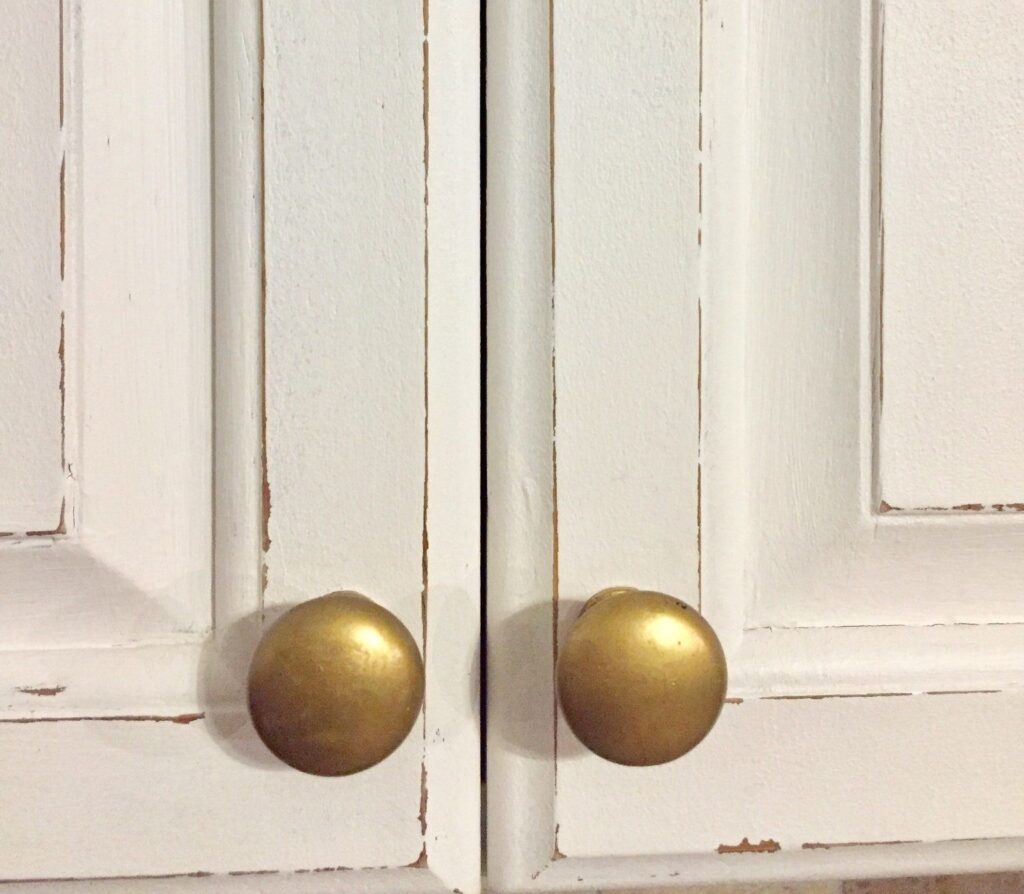
#5 Paint or Replace Your Hardware
Fresh Hardware can make a big impact on kitchen cabinets. Consider spray painting your current hardware (these will not stand the test of time, but a quick and easy way to try out a new color) or buying new to make a big impact on your kitchen!
These are a few of my favorite cabinet pulls on the market!


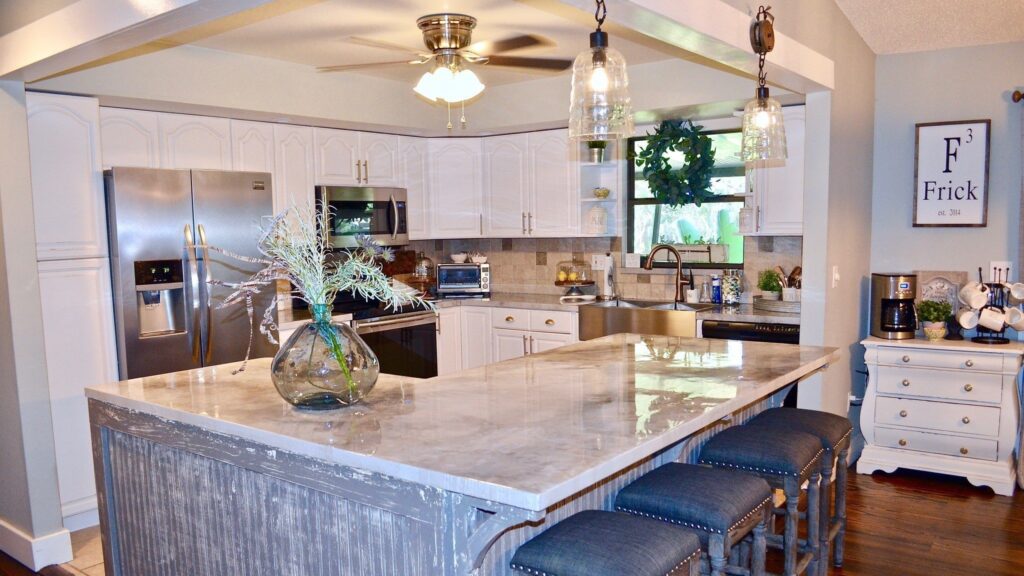
Now the GRAND REVEAL! Use your drill to rehang your cabinet doors. What a transformation!
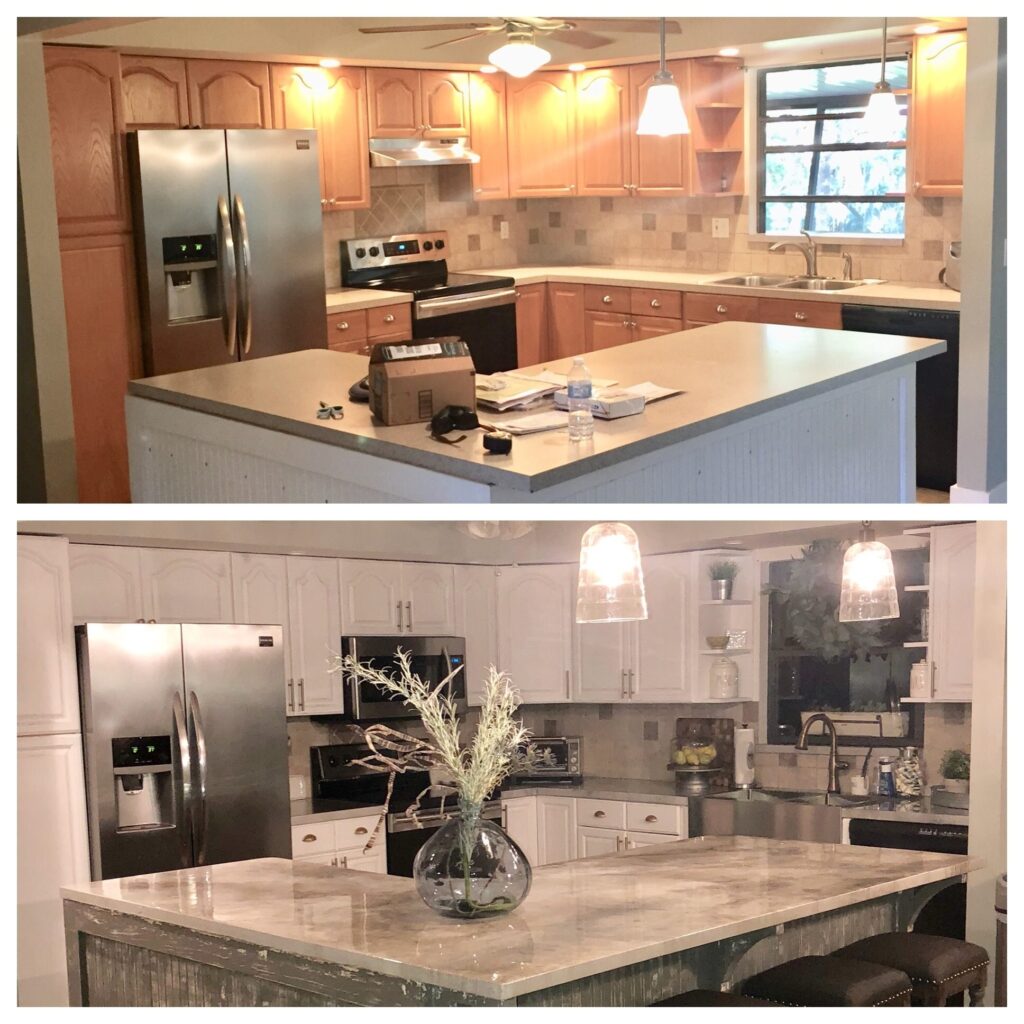
Kitchen Before and After
Shopping List for Cabinet Painting Project:


![]()
Use code frickinfab10
to save 10%


